
Have you ever had something printed, and it didn’t turn out as expected? When you’re resizing images, there are a few things you have to take into account. While we have several blogs dedicated to print size and quality, on occasion we get an inquiry to print an image at a much larger size than the native/original resolution will support. Some people think that an easy workaround to get higher DPI is to simply re-sample the file in Photoshop or Lightroom to get a better/cleaner image. (This is called file bloat.)
Not so, we’re afraid. But WHY? Well, this is where we need to take a much closer look down at the pixel level to see what is really going on.
Your Image File
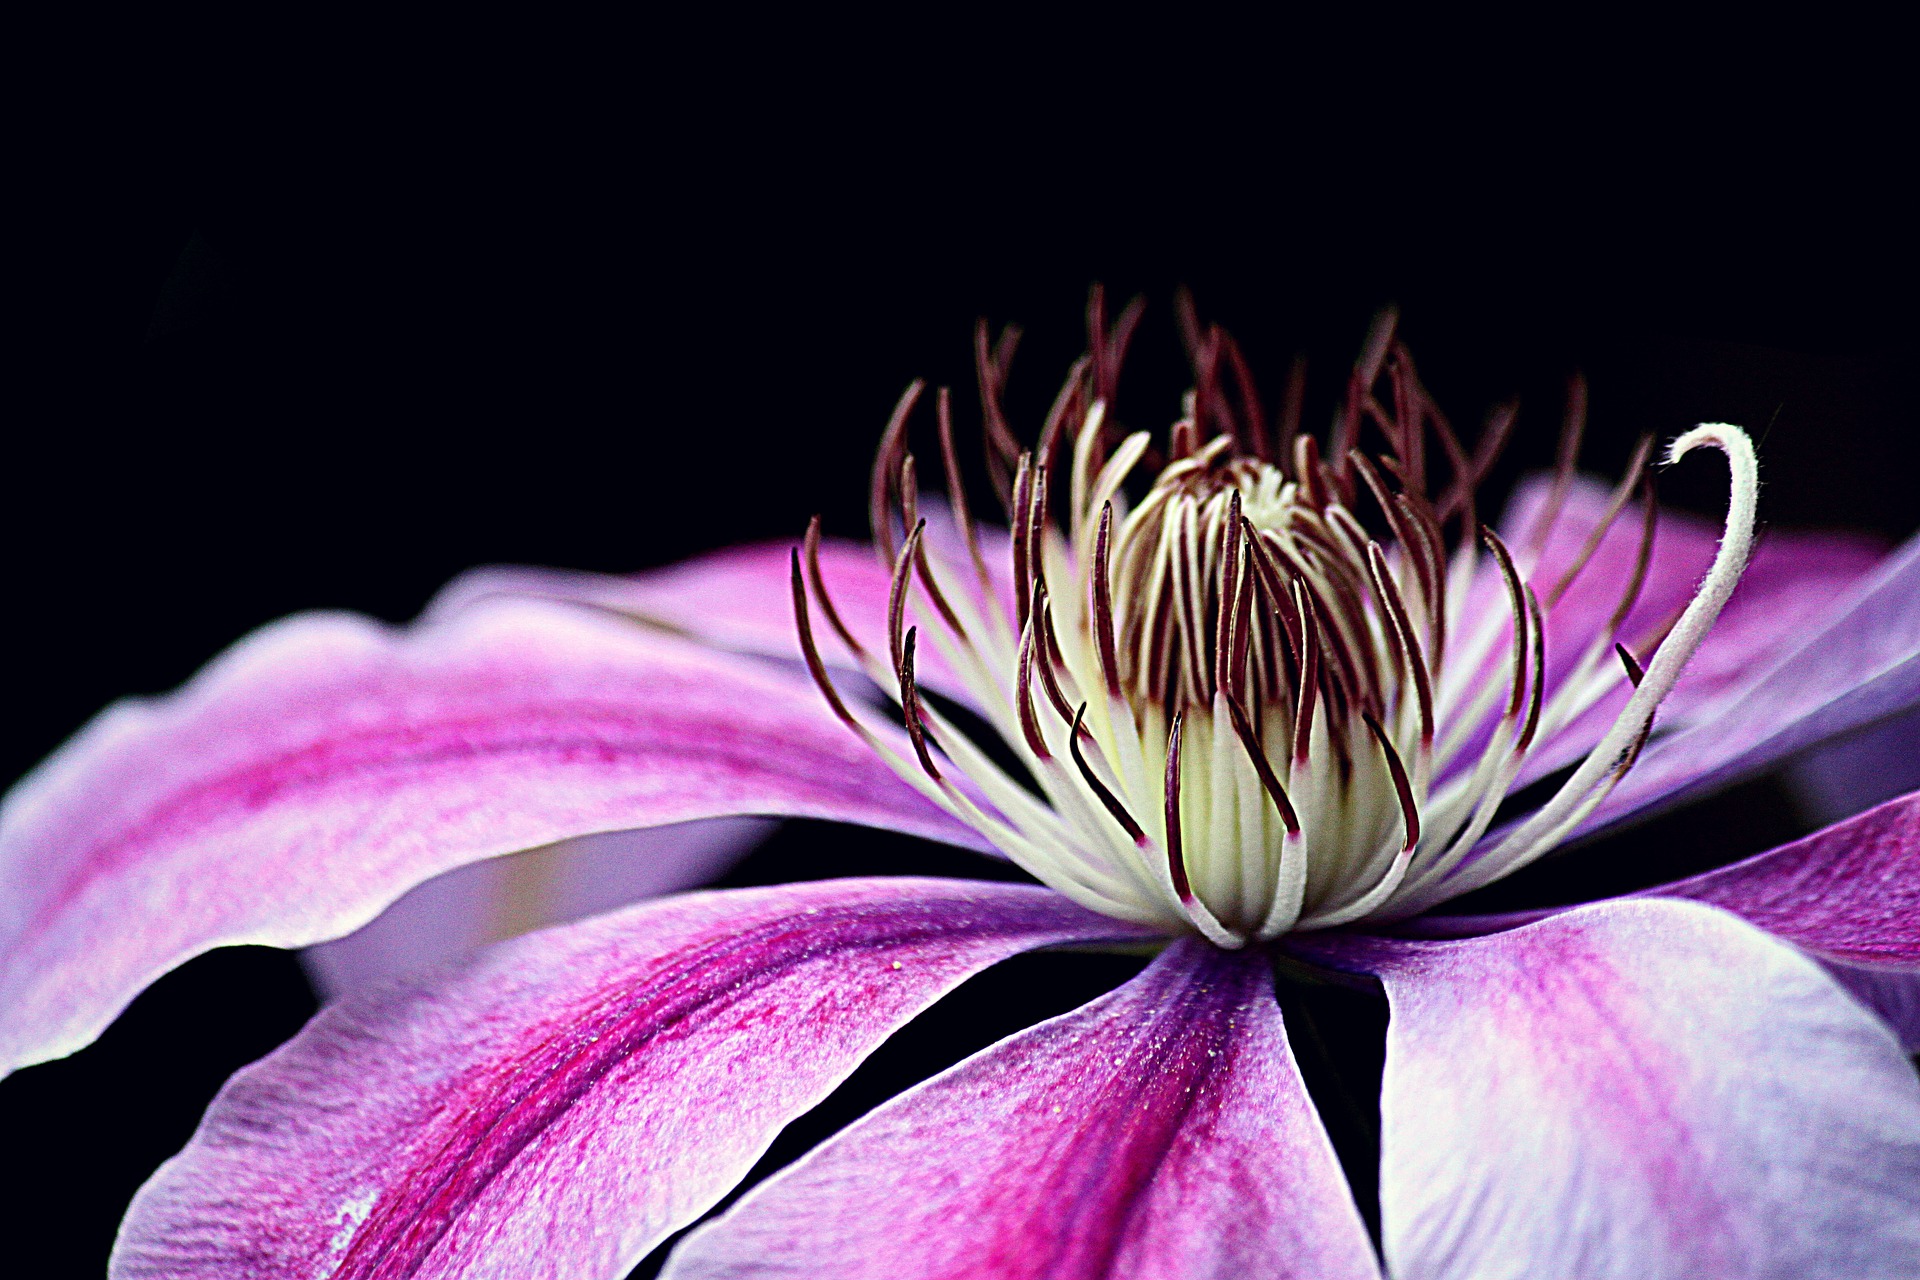
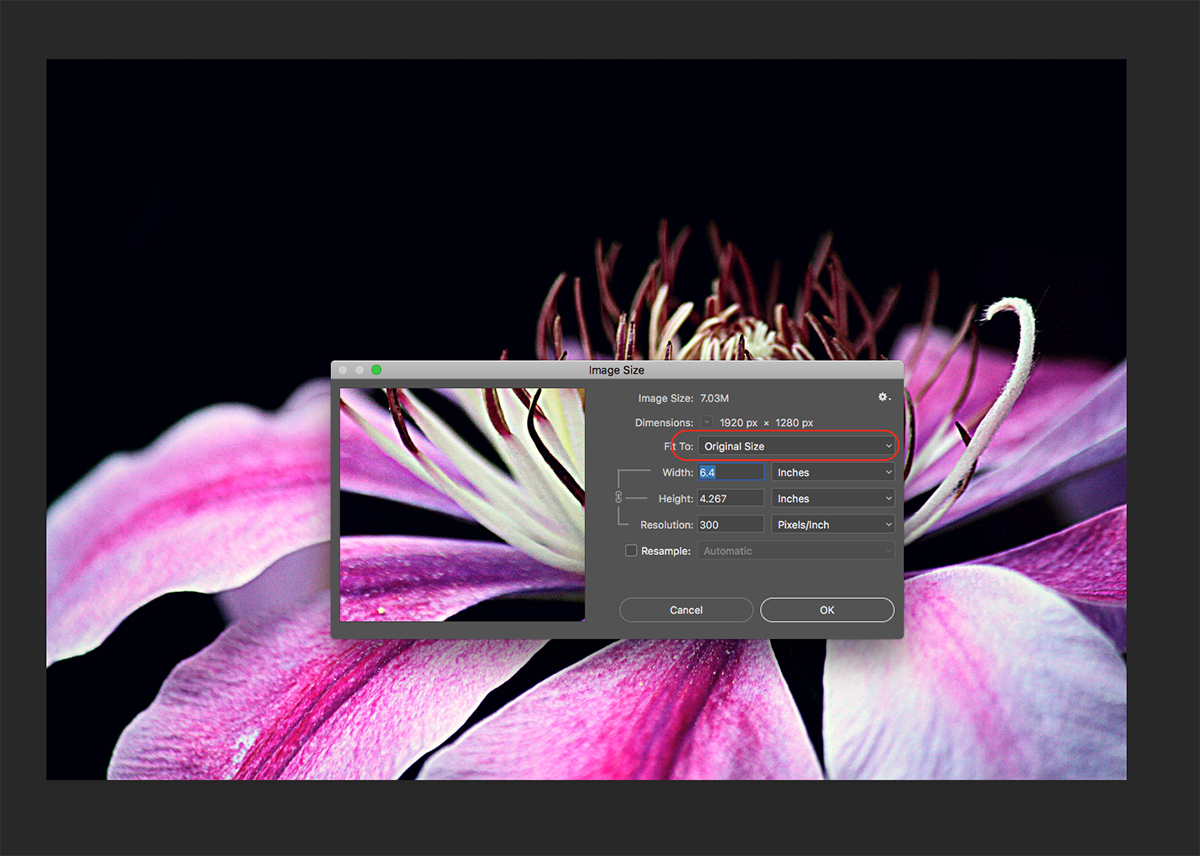
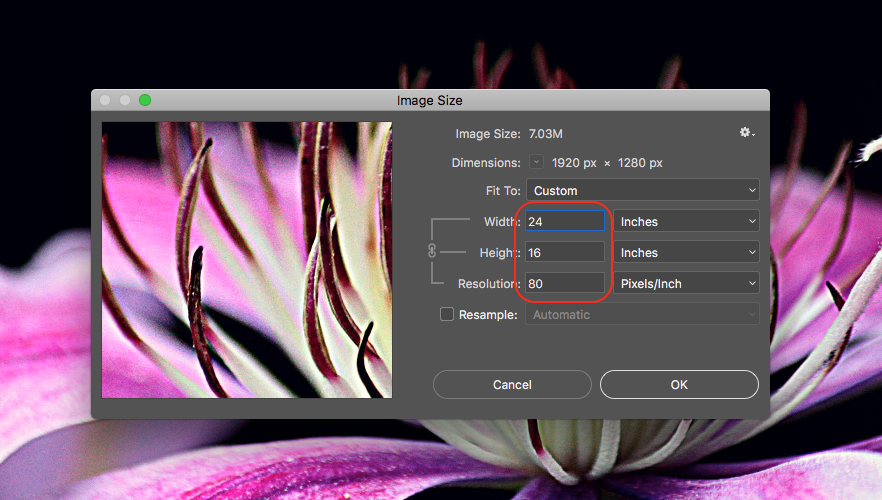
Our sample file was a decent photo, saved as a JPG. The original document or image size, in inches, was 6.4” x 4.267” @300DPI.
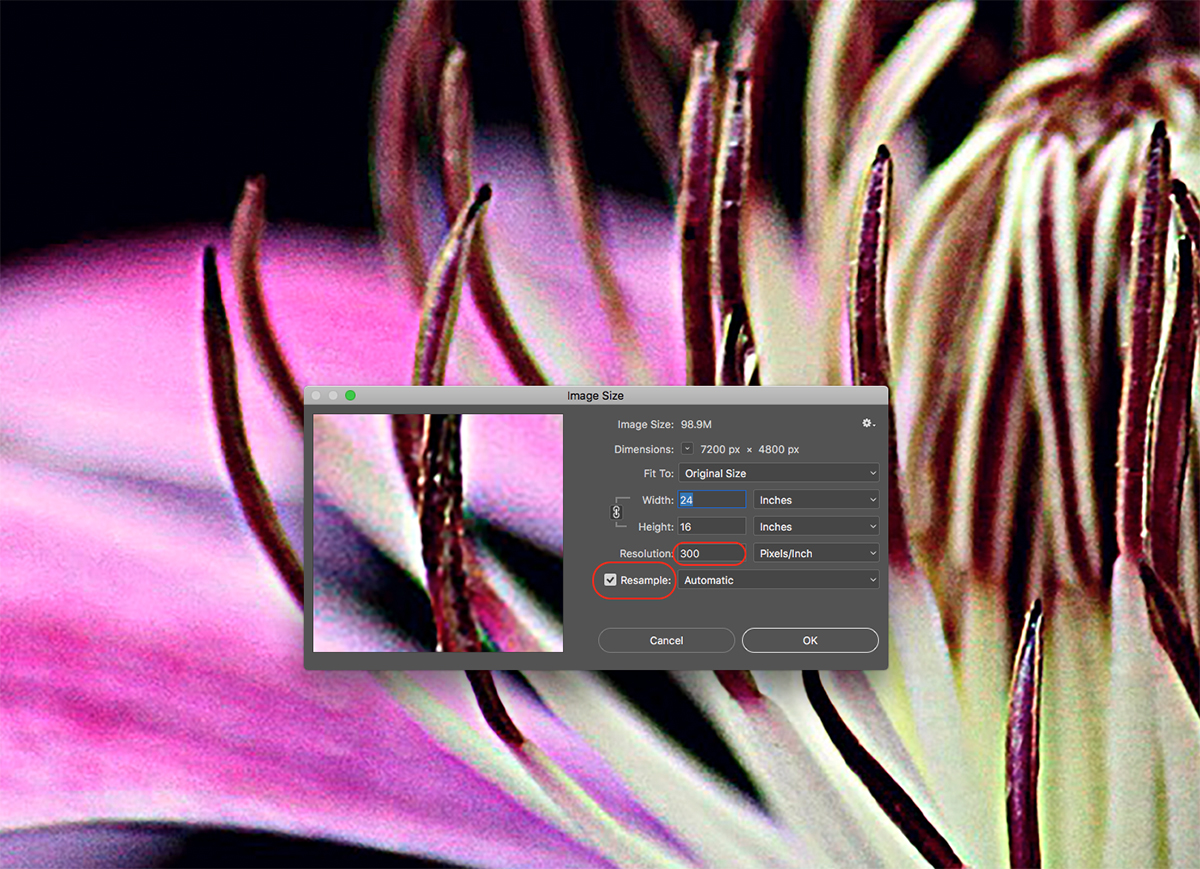
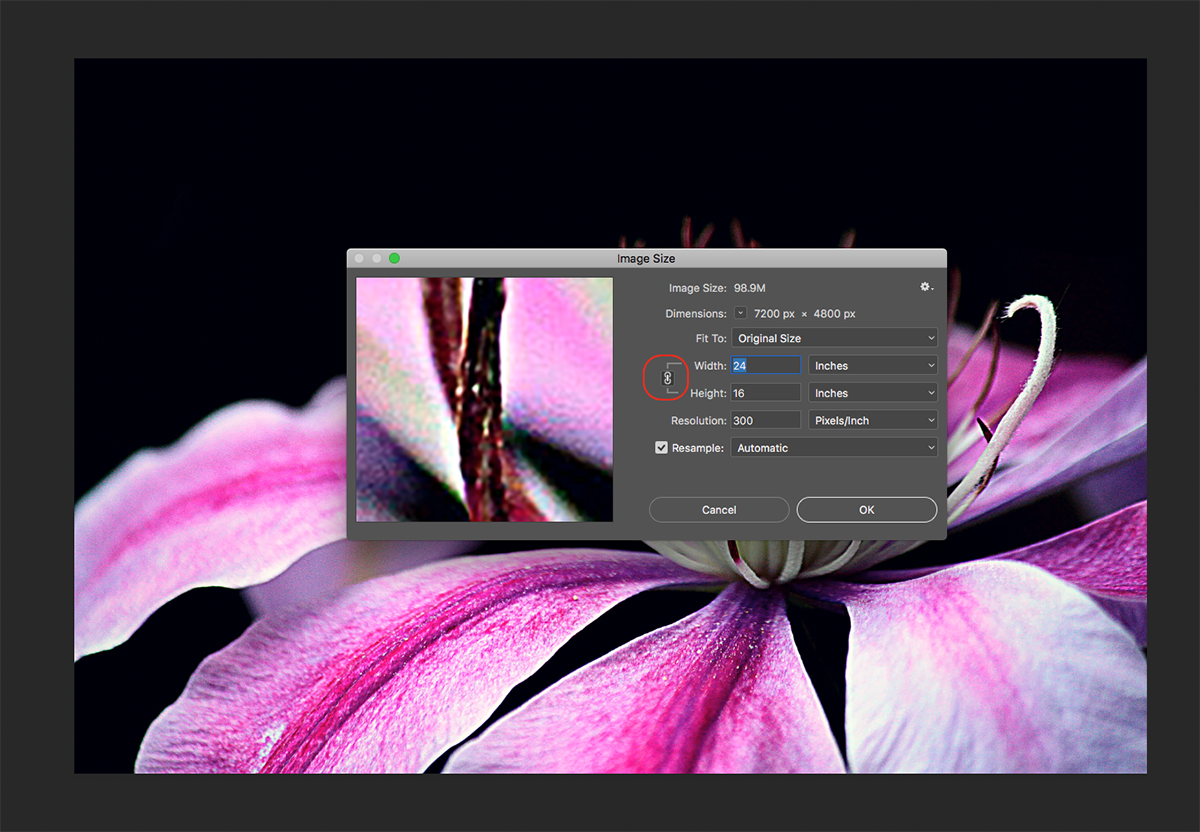
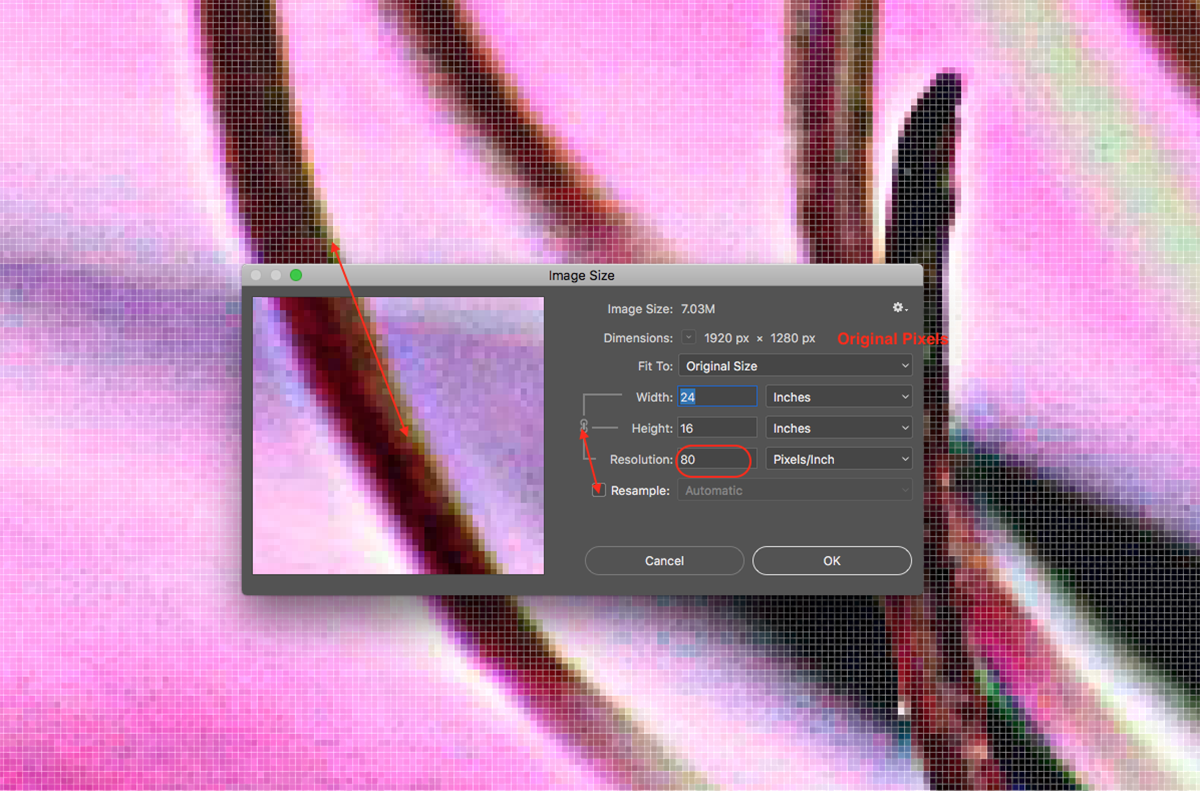
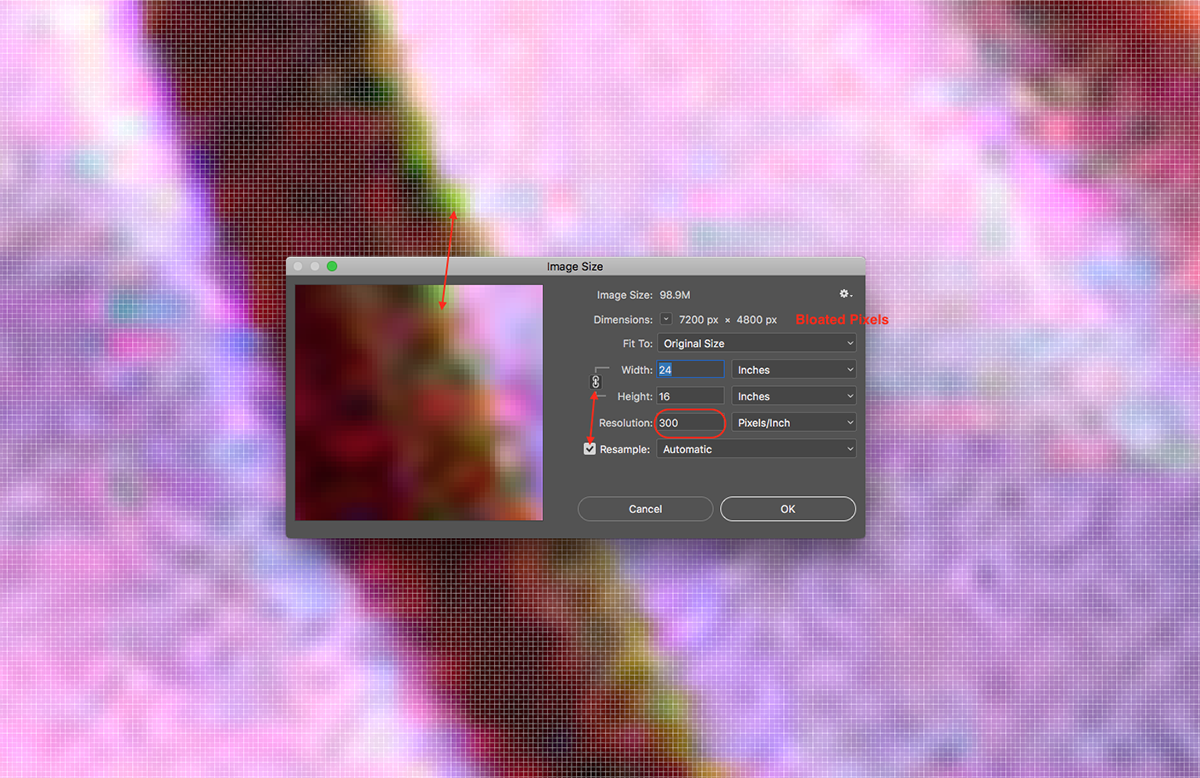
Let’s say you want to print this image at 24”x16” – decent size for a print to hang on the wall, right? But at THAT size, the final DPI would drop down to 80DPI (PPI). So, why not just tell Photoshop to “resample” the image at 300DPI, measuring 24”x16” – easy, right?
Well, yes, easy – but not better. In reality, what you are asking the software to do is to pack more pixels in per inch…. more, not better. Imagine if you would that a pixel measures 1”. If you resample to 2x the size, the pixel will be split into 4 ½” blocks. Same color, same grain, etc., but you do have MORE pixels. So why won’t it print better? Well, mainly because the color information is still the same, there’s just more of it.
Changing to Higher Resolution
So, how does one get a better, higher resolution photo from a small original asset? There are (2) main options:
A) If you are fairly proficient in Photoshop, you can “step-res” – meaning, you enlarge the image / DPI with resample ON – but you do it in small increments. After each enlargement, you will have to work on the contrast, noise, blur, sharpen effect, and do that until you reach your final file / print size. Not only does this require a decent amount of skill, but also time. See our steps below:
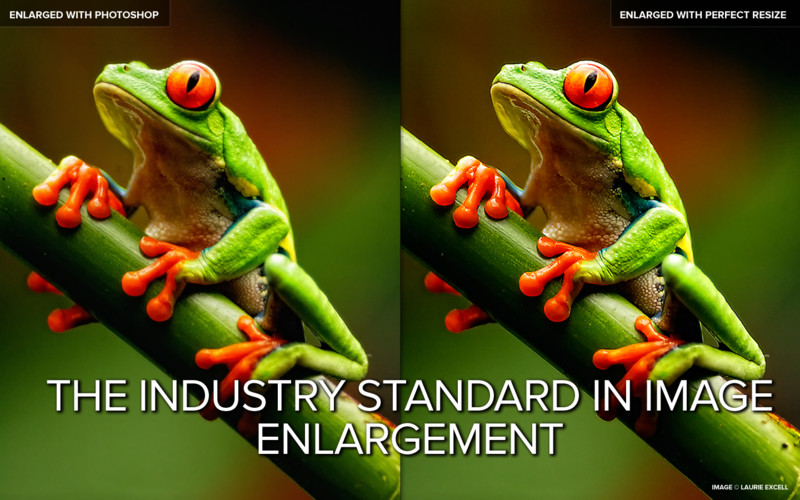
B) As an alternative, you can utilize one of several quality “up-res” tools or plugins. Here at Artisan, we like to use ON-1 Resize. (Formerly Genuine Fractals) This powerful plug-in actually creates NEW pixels, splitting/creating pixels and giving you a smother transition between the enlarged pixels.
Here’s a video demonstrating ON-1 Resize:
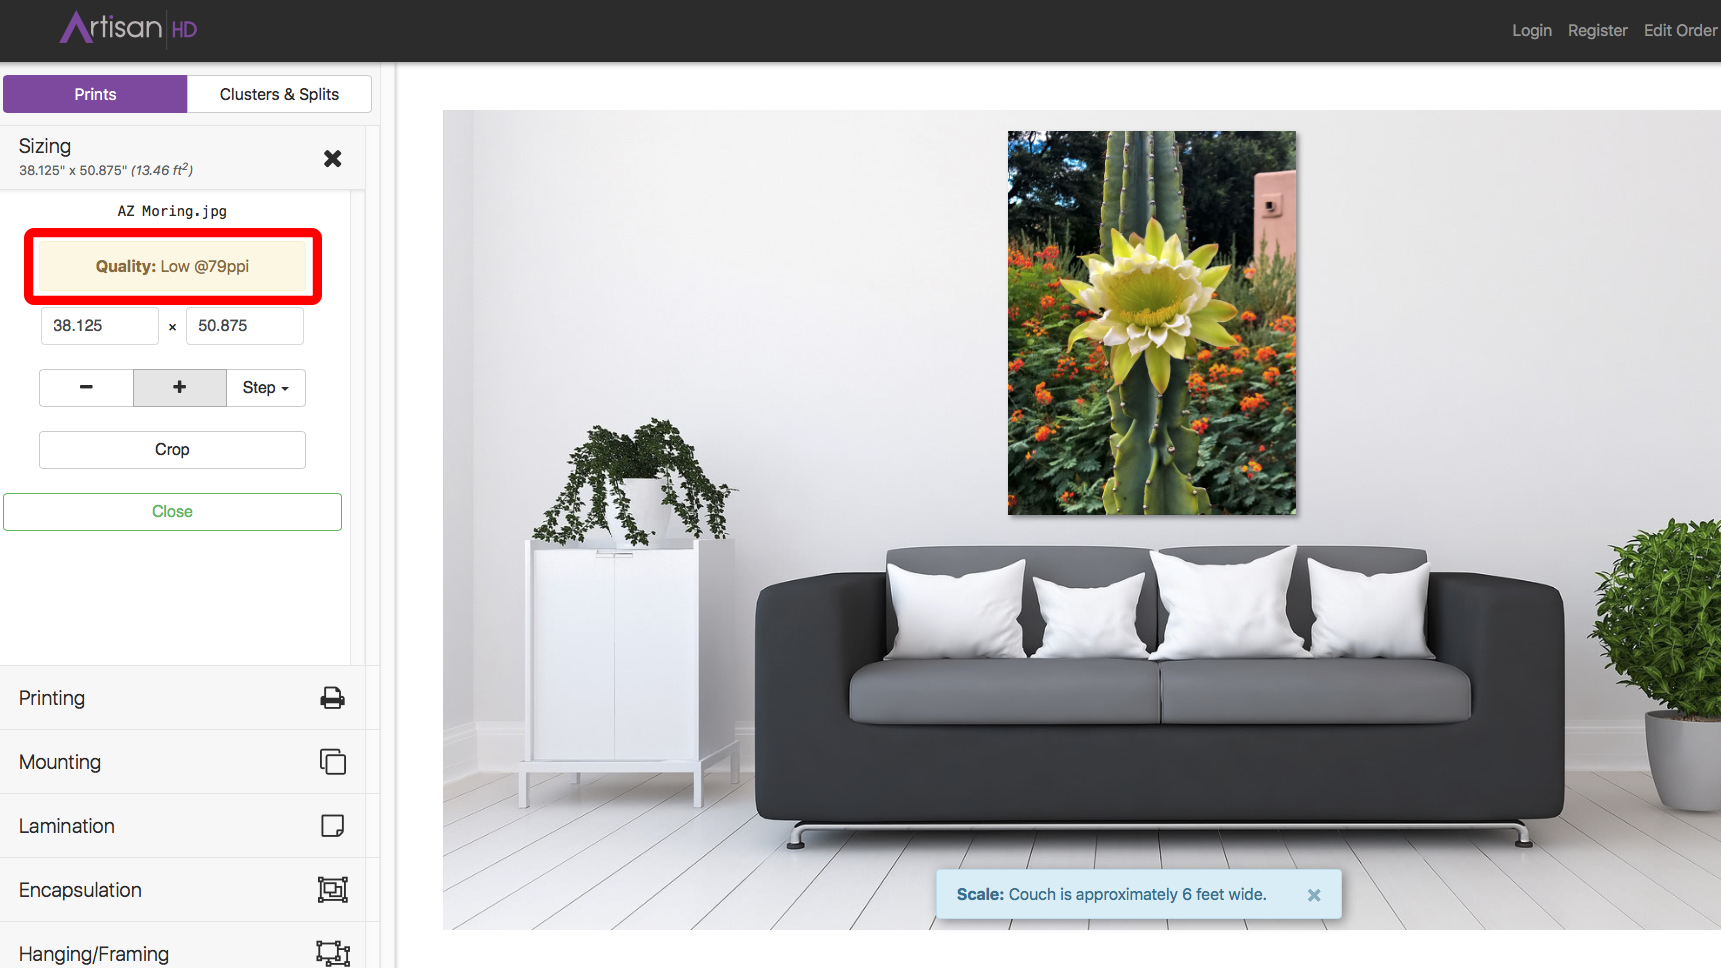
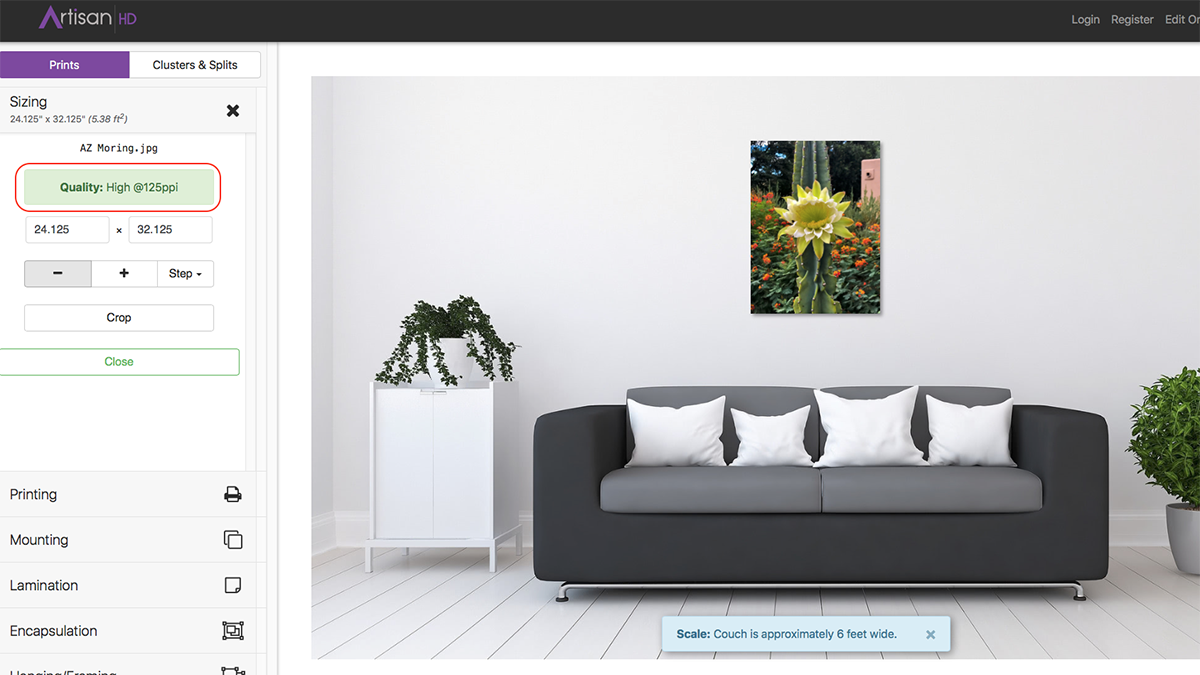
Artisan’s Custom Uploader
WHY is this important? Primarily, when you upload a file to our website, we have a quality checker/DPI script that runs as you upload your file. It senses the original DPI/pixel dimension of your file and will give you an Excellent, High, Average, or Poor rating. This is in place to warn clients in case they start to size the image TOO BIG for a quality print. BUT, if you BLOAT your file by simply resampling it, the software we use can’t tell the difference between many more “bad pixels” vs. many clean pixels.
This can lead to disappointment or surprises when you finally get your print, and it still looks blurry, or pixilated. So, while megabytes and pixels dimensions are very important, don’t be fooled by a quick up-res while you’re resizing images.
If you are not familiar with Photoshop, or would rather not mess with it, don’t worry! Simply send us the files via the Custom Print Services Page and we can review, edit, and optimize your files for you. After we’re all done, you will also get the high res .TIF file sent to you (via download link) for your own records and future use.
What’s Next After Properly Resizing Images?
After you’re done resizing images, it’s time to print! Choose your image, make sure it’s the correct size and DPI for printing, upload it to our Customizer, and create the size and type of print you’d like. Visit our Quick Tutorials YouTube playlist for an intro or a refresher. Let us know if you have any questions!
If you’re looking for a lightweight solution to image printing or custom decor, check out our Direct to Sintra Board sale. Get 30% OFF through July 18th with code GOUSA30 at checkout!


Leave A Comment